We’ve created a unique rental experience that differs significantly from other rental platforms you’ve used in the past. Most peer-to-peer rental platforms look like Facebook Marketplace, where folks list their gear and it’s up to the renter to sort through a massive list, just to find one specific item they are looking for and then do the outreach themselves to see if that person is available. This is not ideal, it makes renting tedious and cumbersome and in some cases, can make it even harder for a renter to find what they are looking for. Especially if this renter has never been camping before, they don’t care what brand the tent is, just that it’ll fit their needs and is available for the weekend. On GeerGarage, you don’t have to worry about all that! We’ve created an experience where renters go into our platform, they select what type of gear they want based on activity categories and then by providing a few parameters, our system will do all the work to identify an available lender in their area. Our goal in this is to remove any barriers to getting outside, making it quick and easy to pick an adventure, grab the gear and head outside! To learn how the rental process works, follow the steps below:
Log in to your existing GeerGarage account or sign up to the platform using your email or phone number.
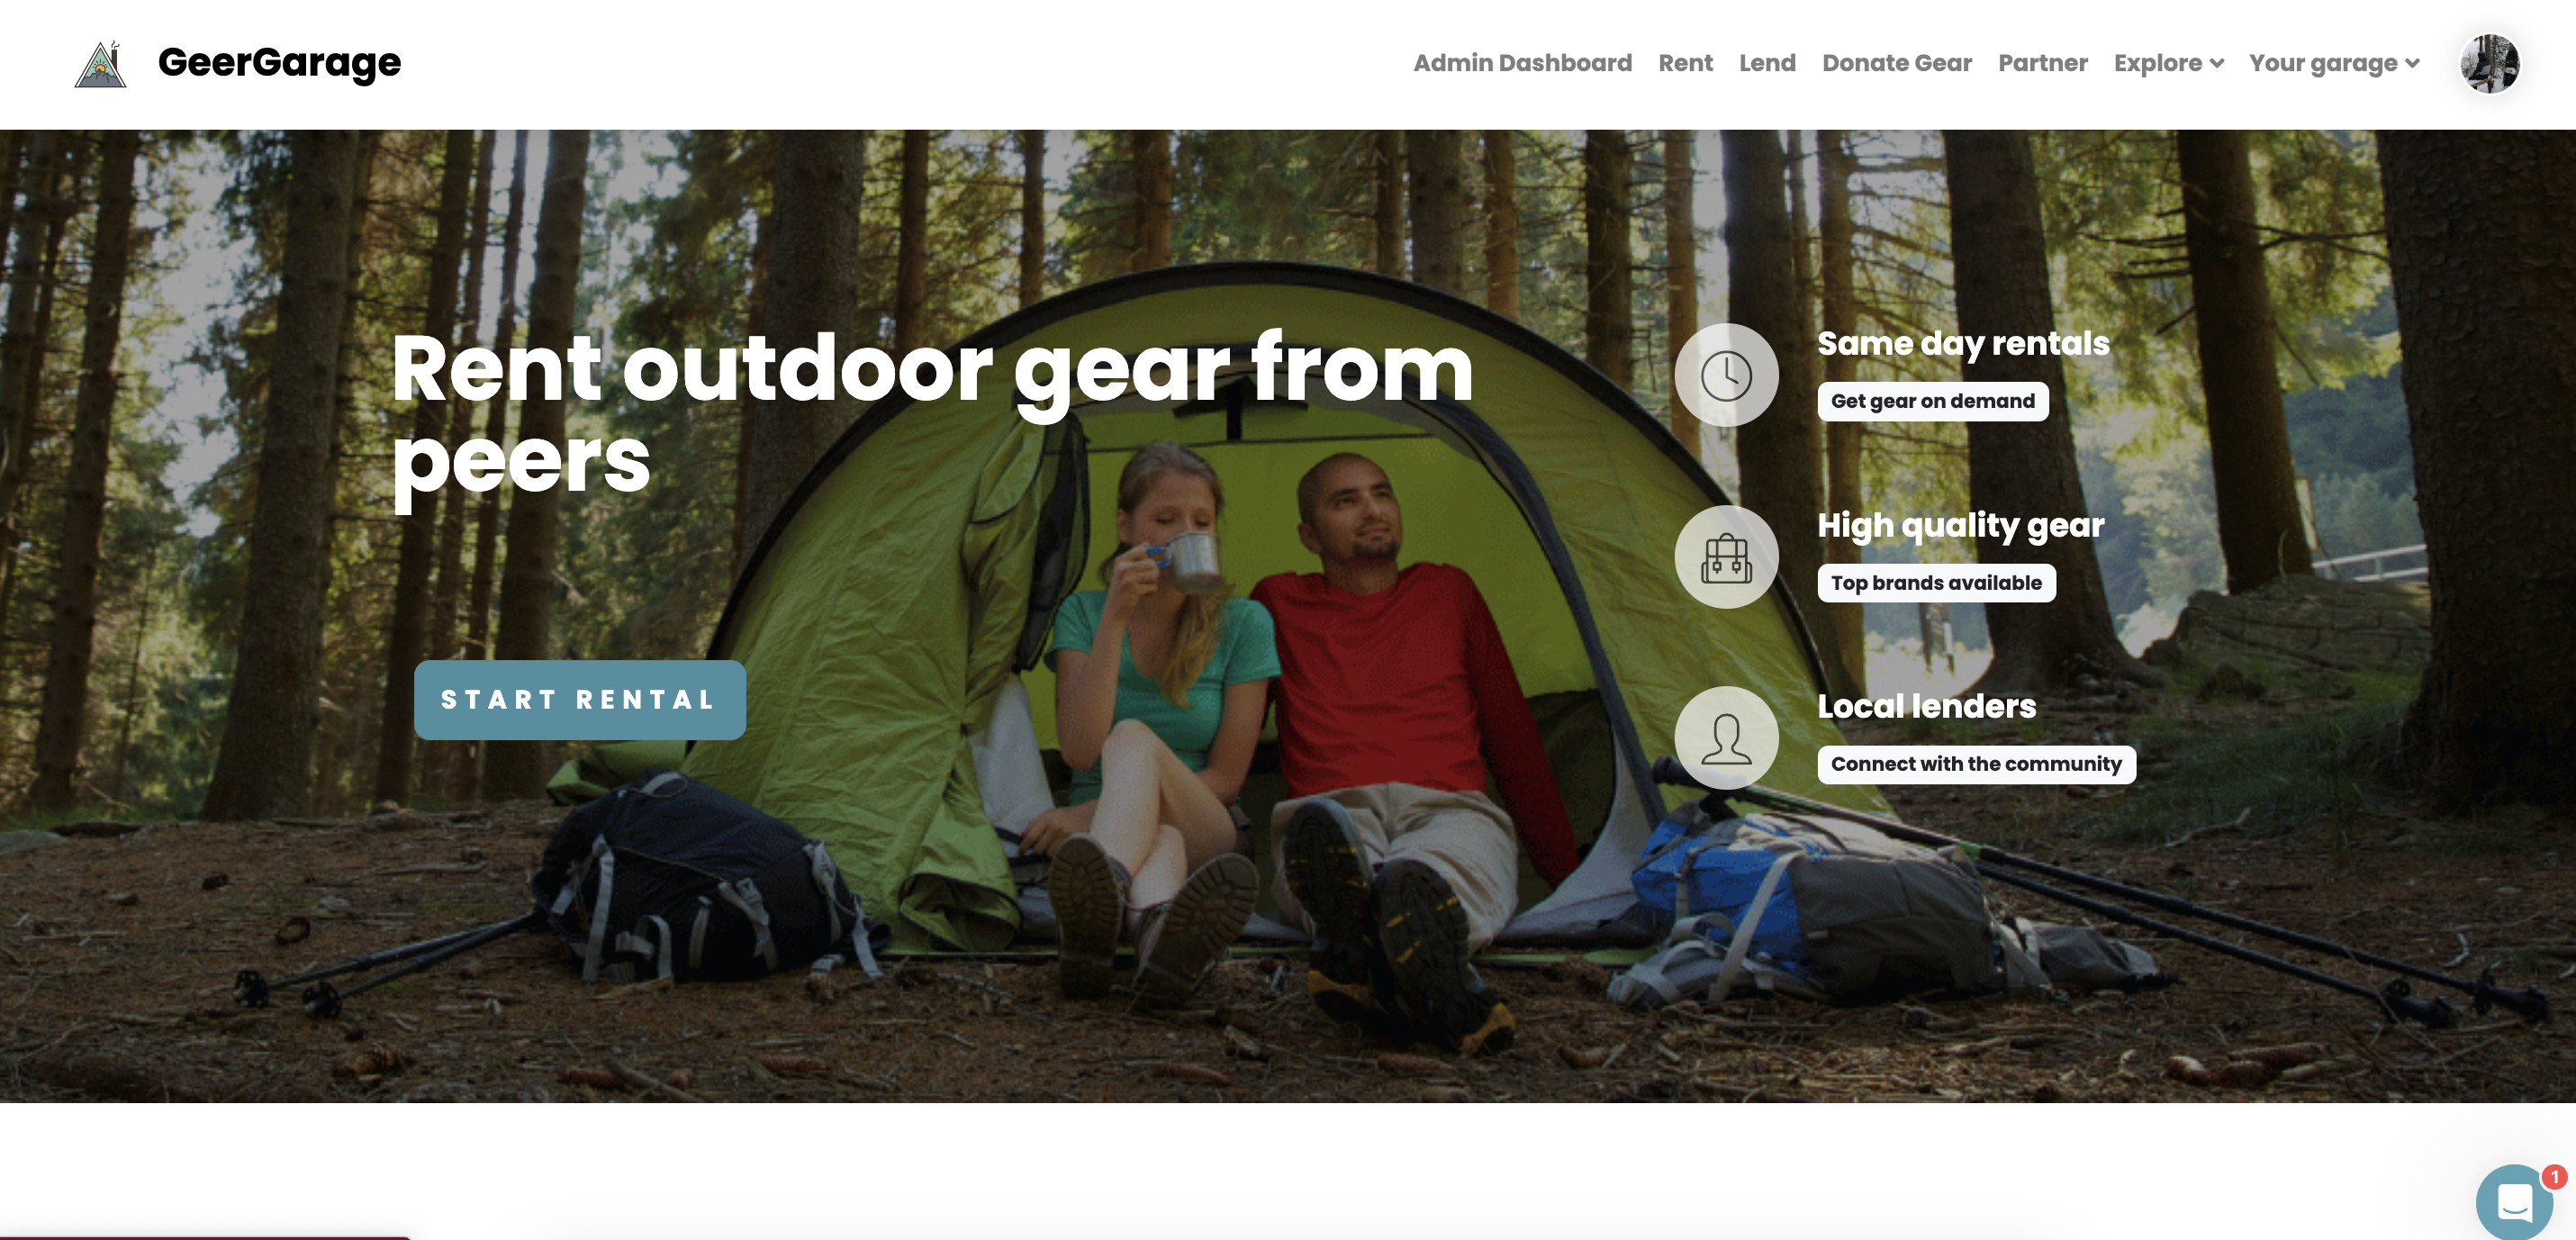
Once you are on the home page, click “Start Rental” on the banner image or click “Rent” on the top navigation bar.
From the rental page, start by entering in the desired dates and location that you want to rent this gear. Once you’ve entered in this information, click “Find Gear”.
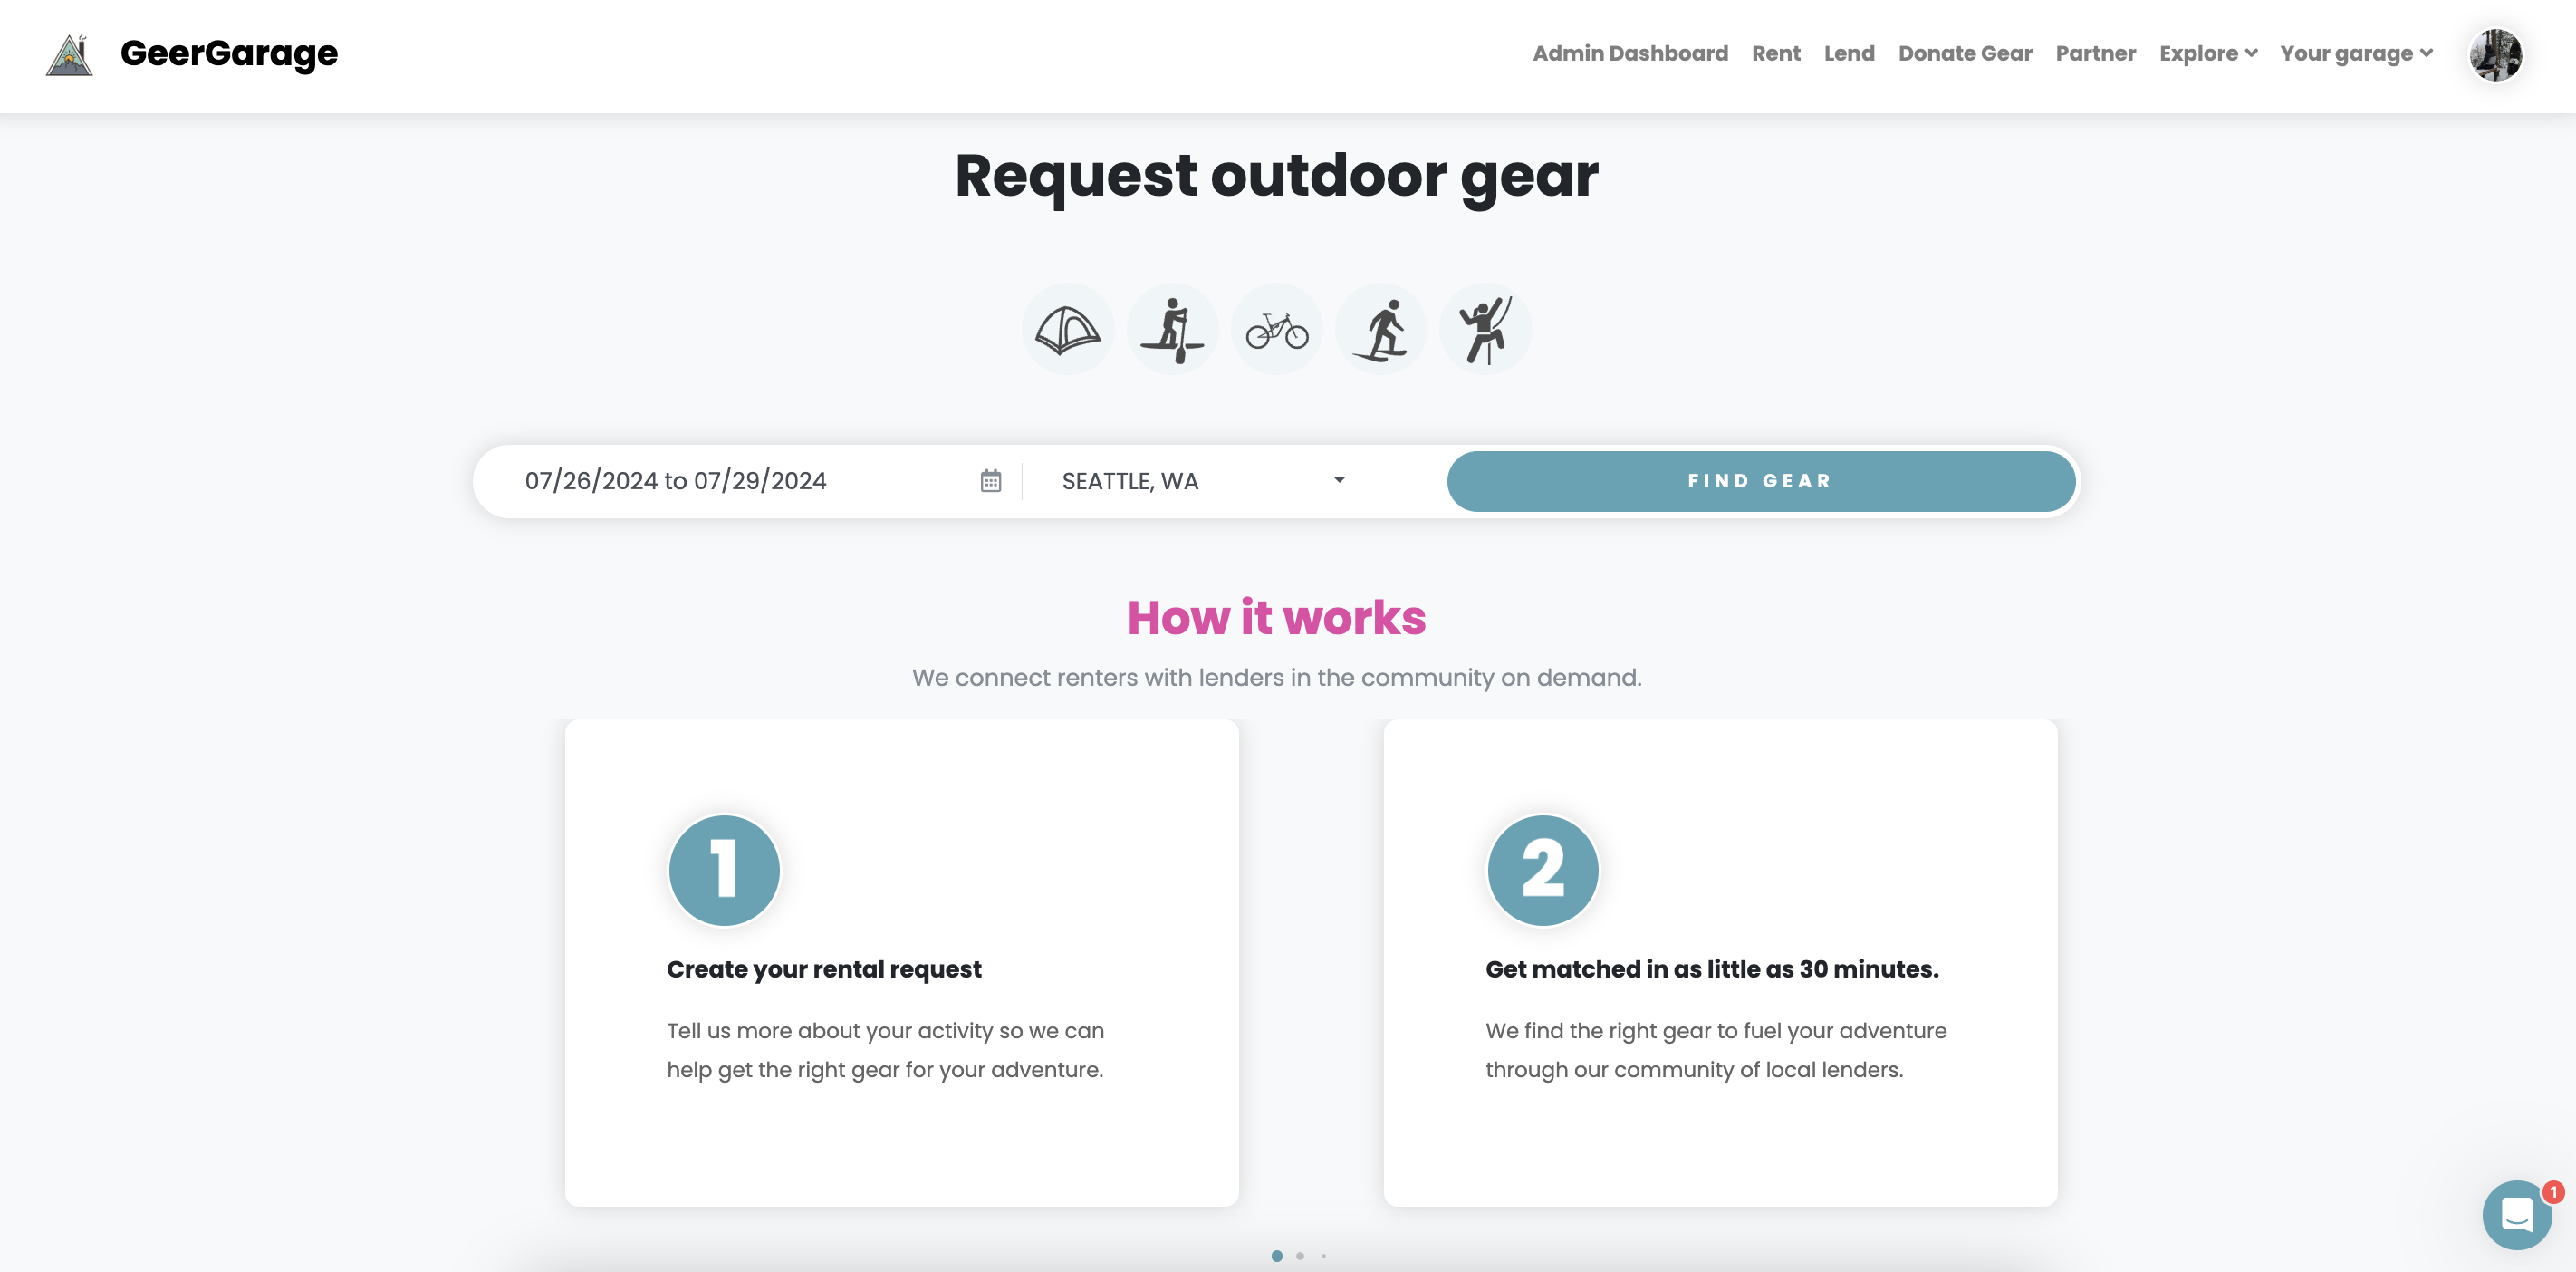
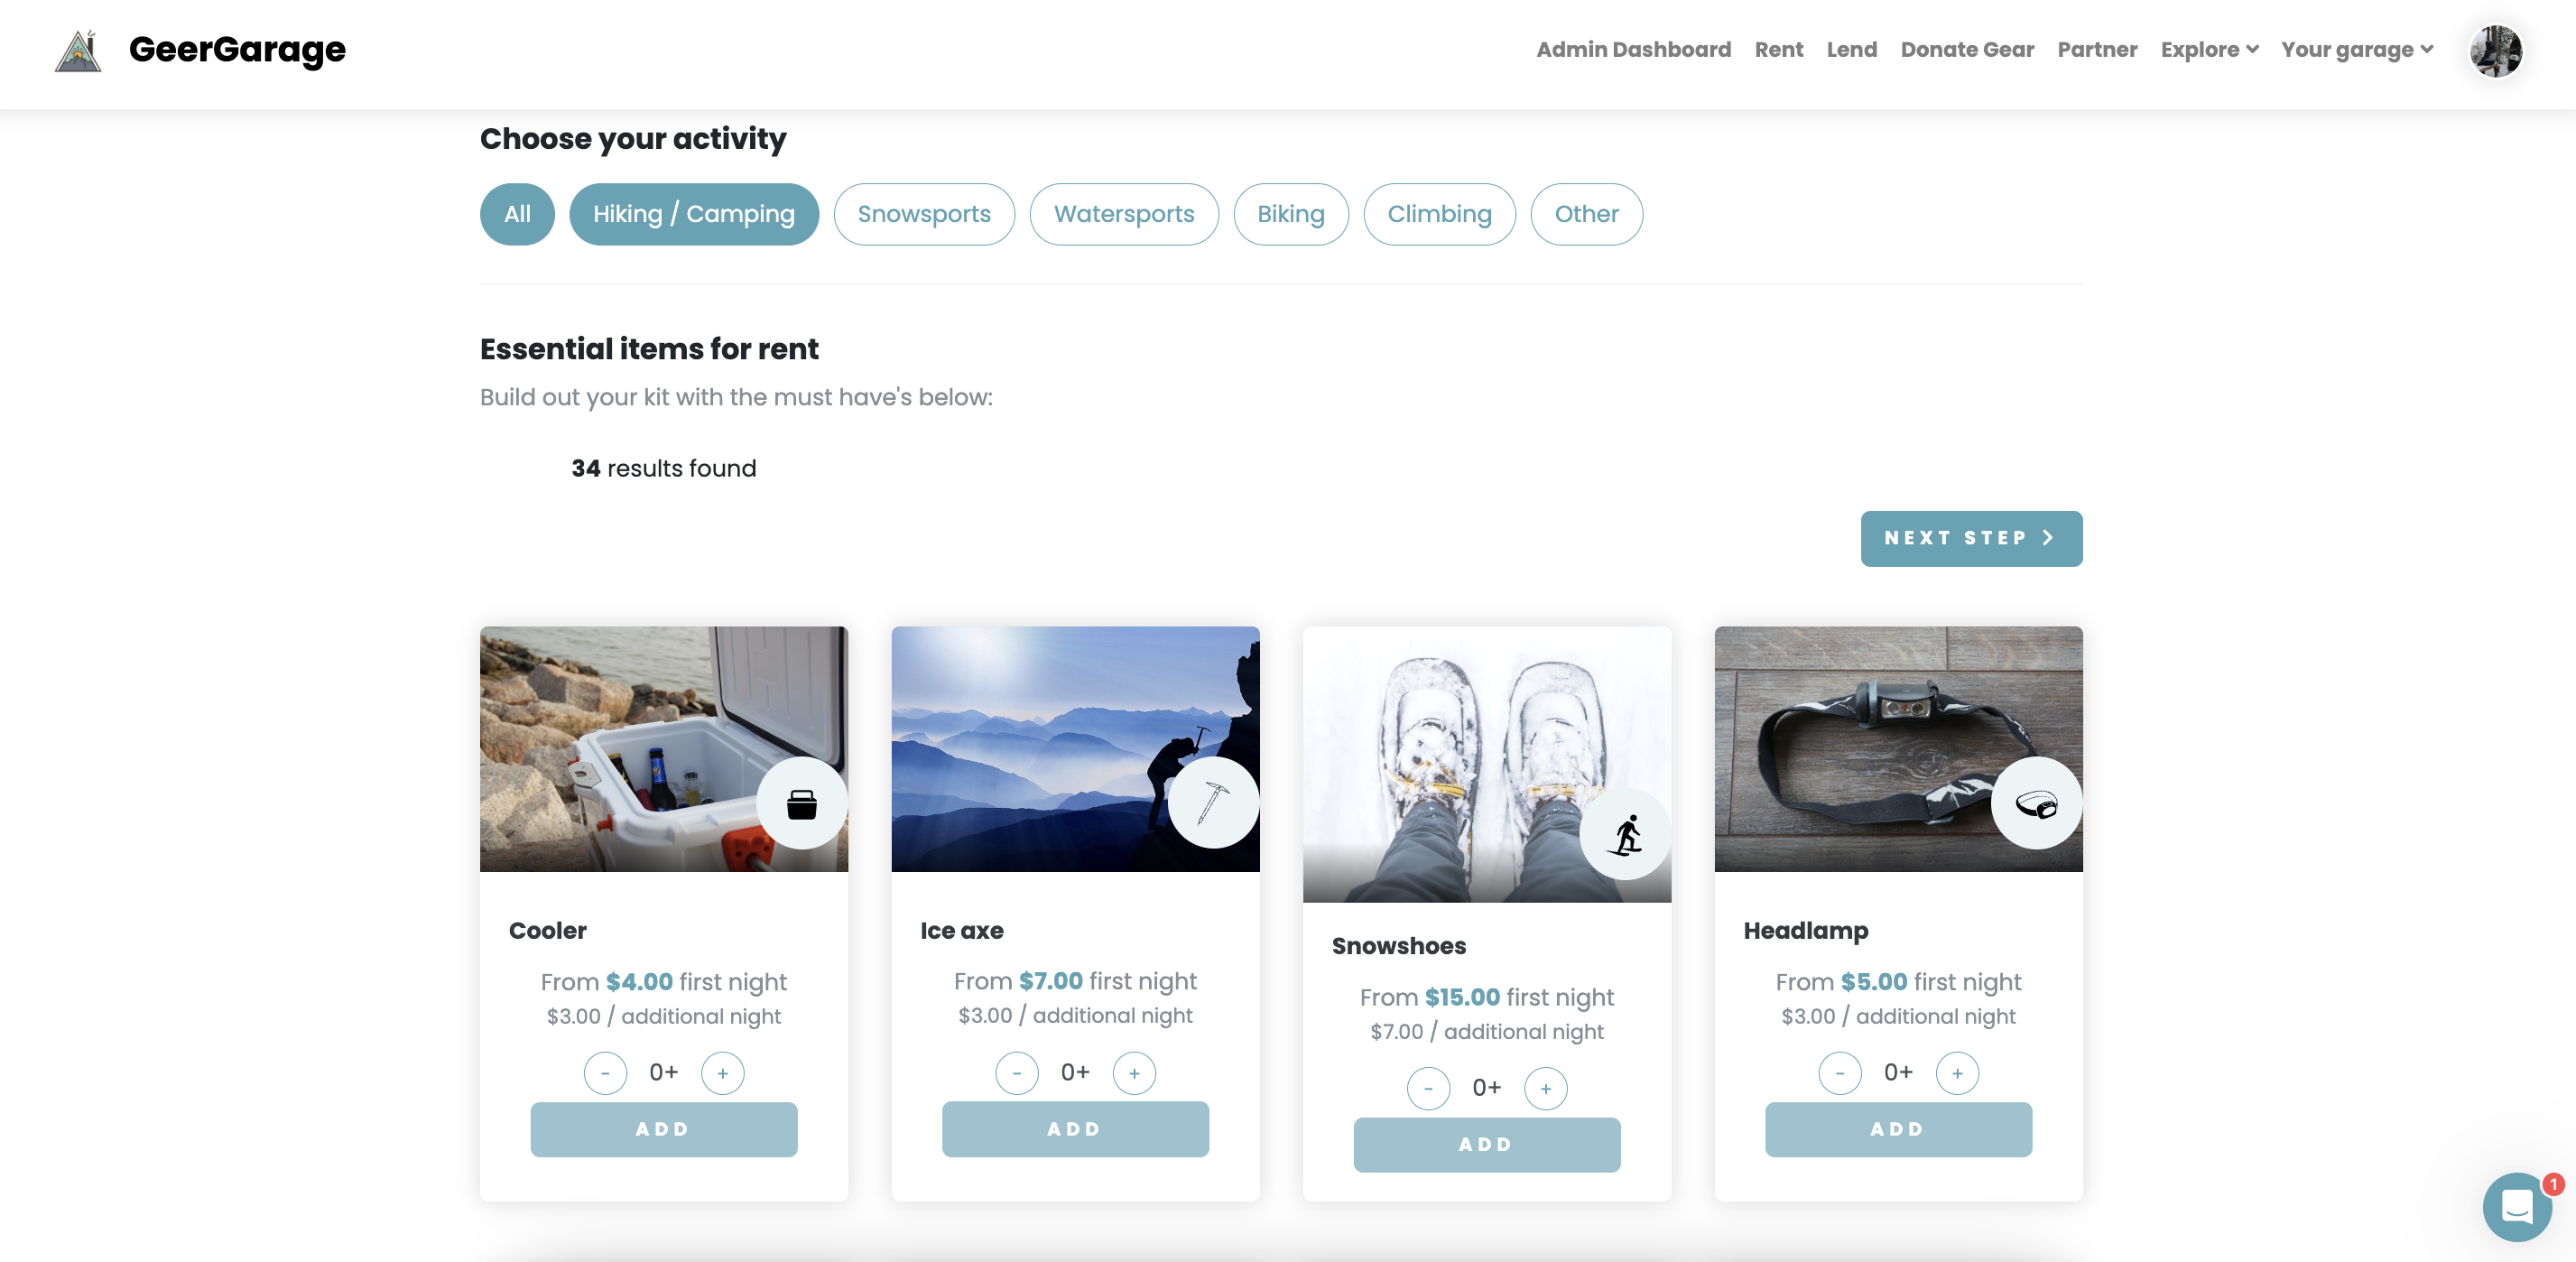
On this page, you can find the gear you are looking for by selecting the activity you want to do, or you can scroll down and select by individual item.
To select an item, click the + and then click “Add”. If you wish to select multiples of the same item, click the + until you have your desired quantity.
If you want to select multiple items, simply click the + on those items and click “Add” on each item you want to rent. They will all get added to your cart, once you specify the quantity and add them.
Once you’ve selected all the items you are looking for, click “Next Step” at the bottom of top of the page.
You are now able to review your gear selection, ensuring that you have all the items you are looking for and the right quantities. If you wish to add any items, simply click “Add more items” and repeat step 4.
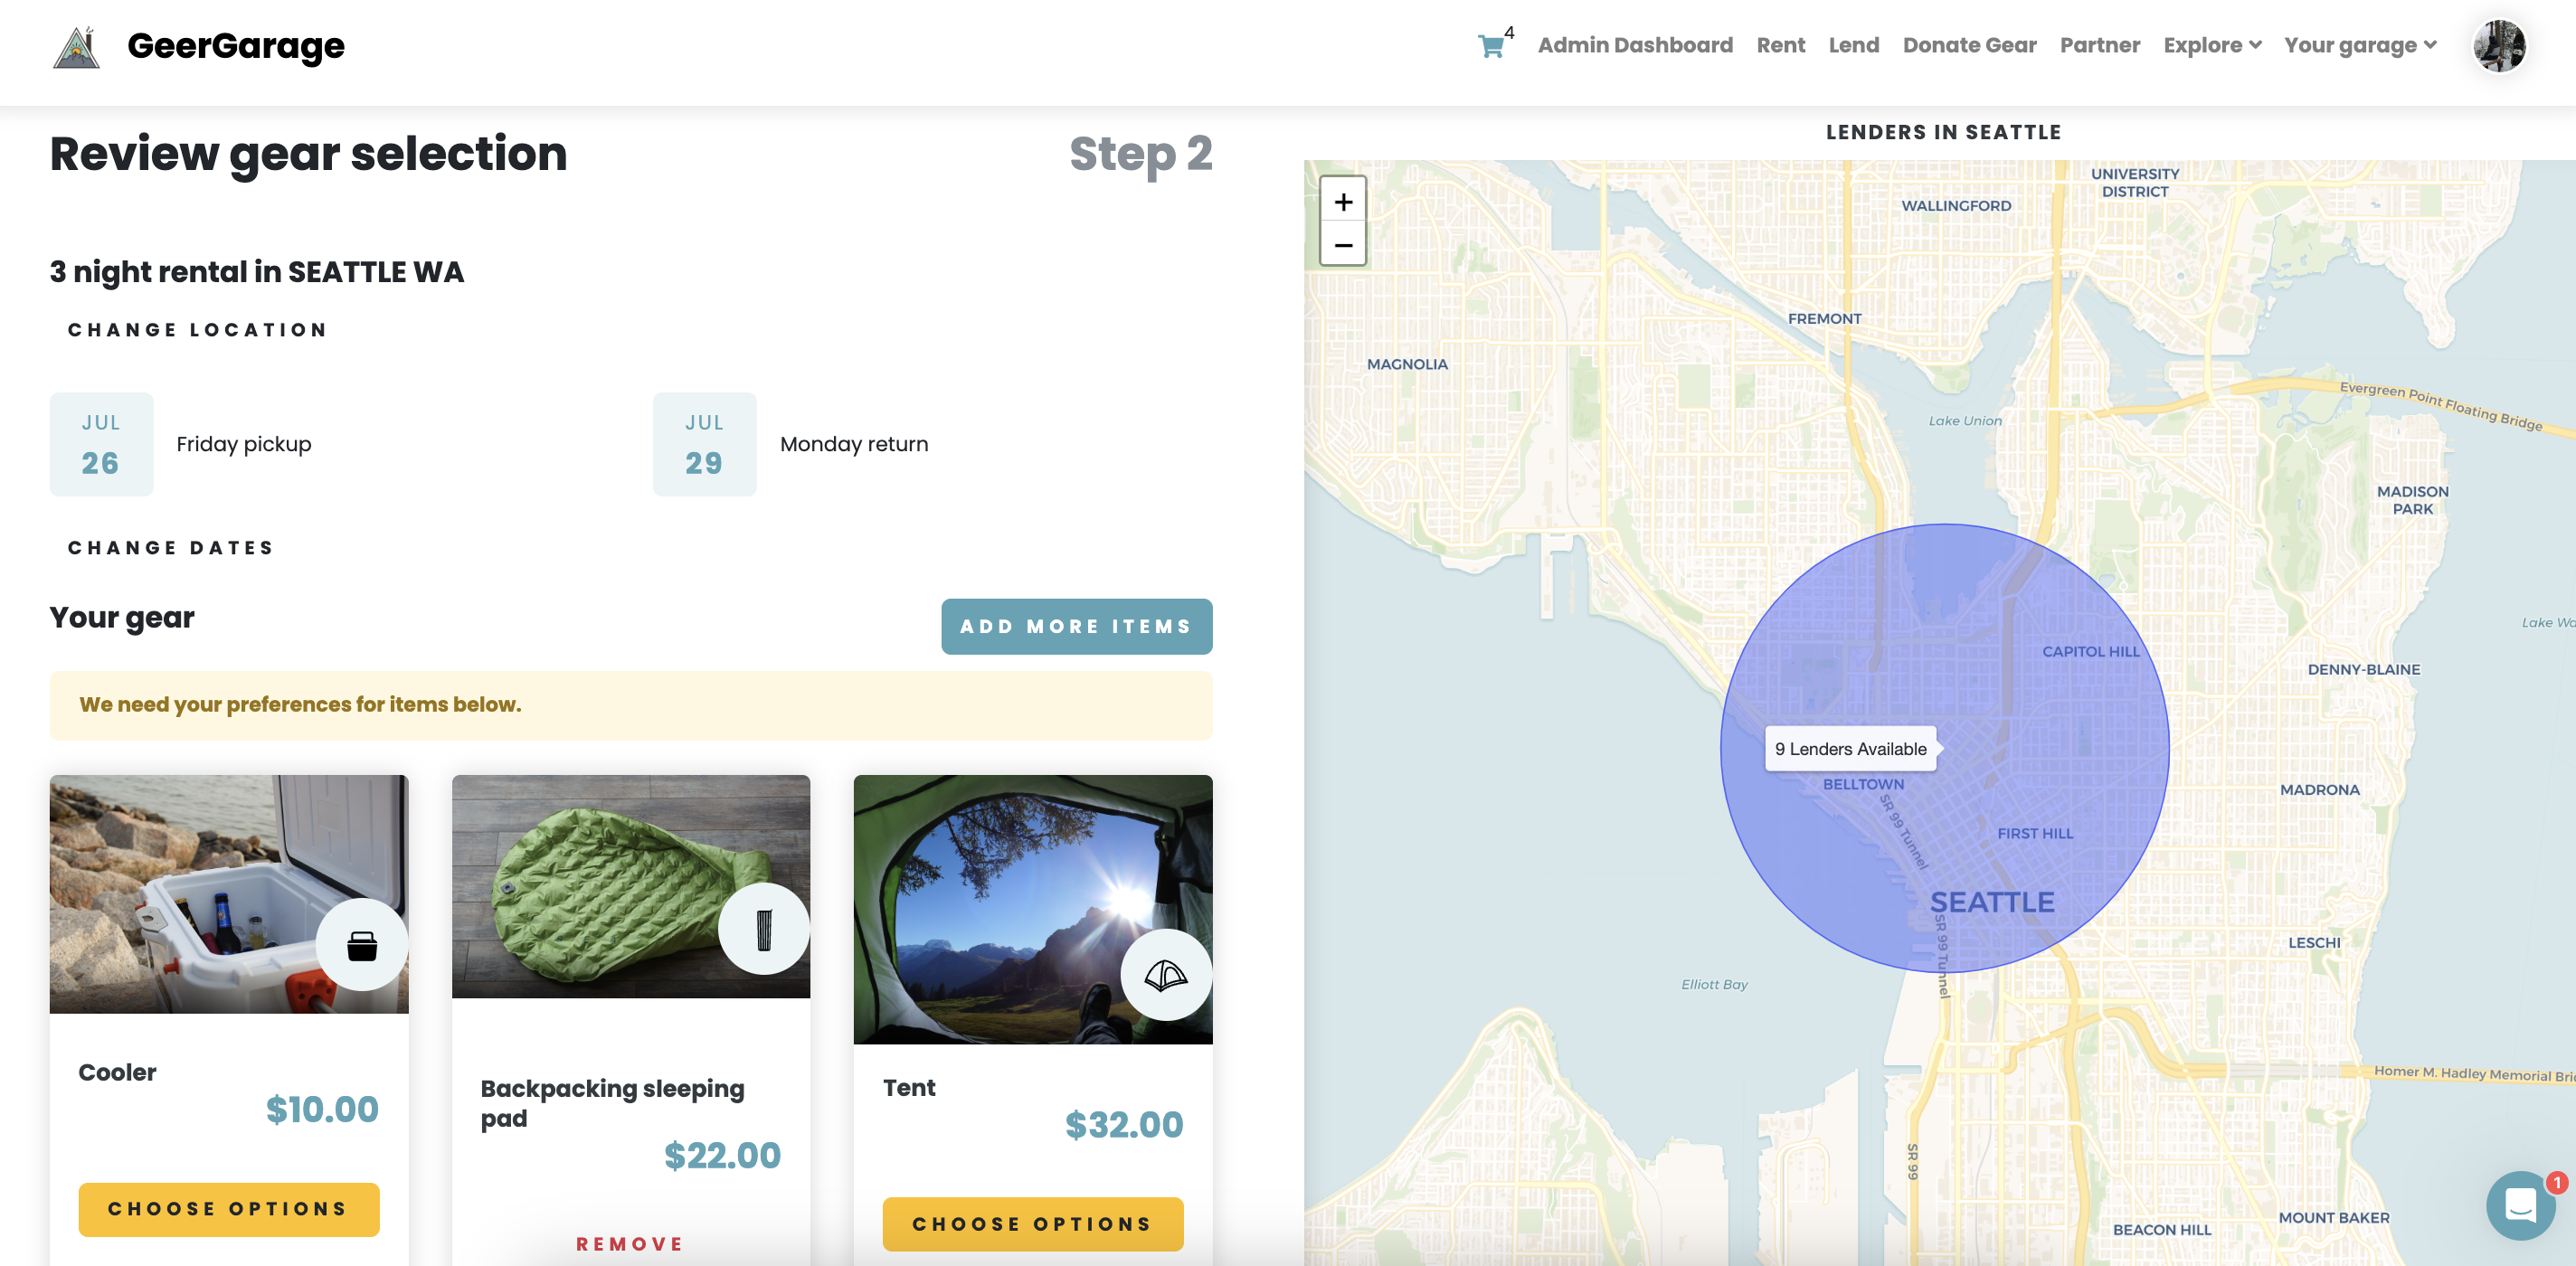
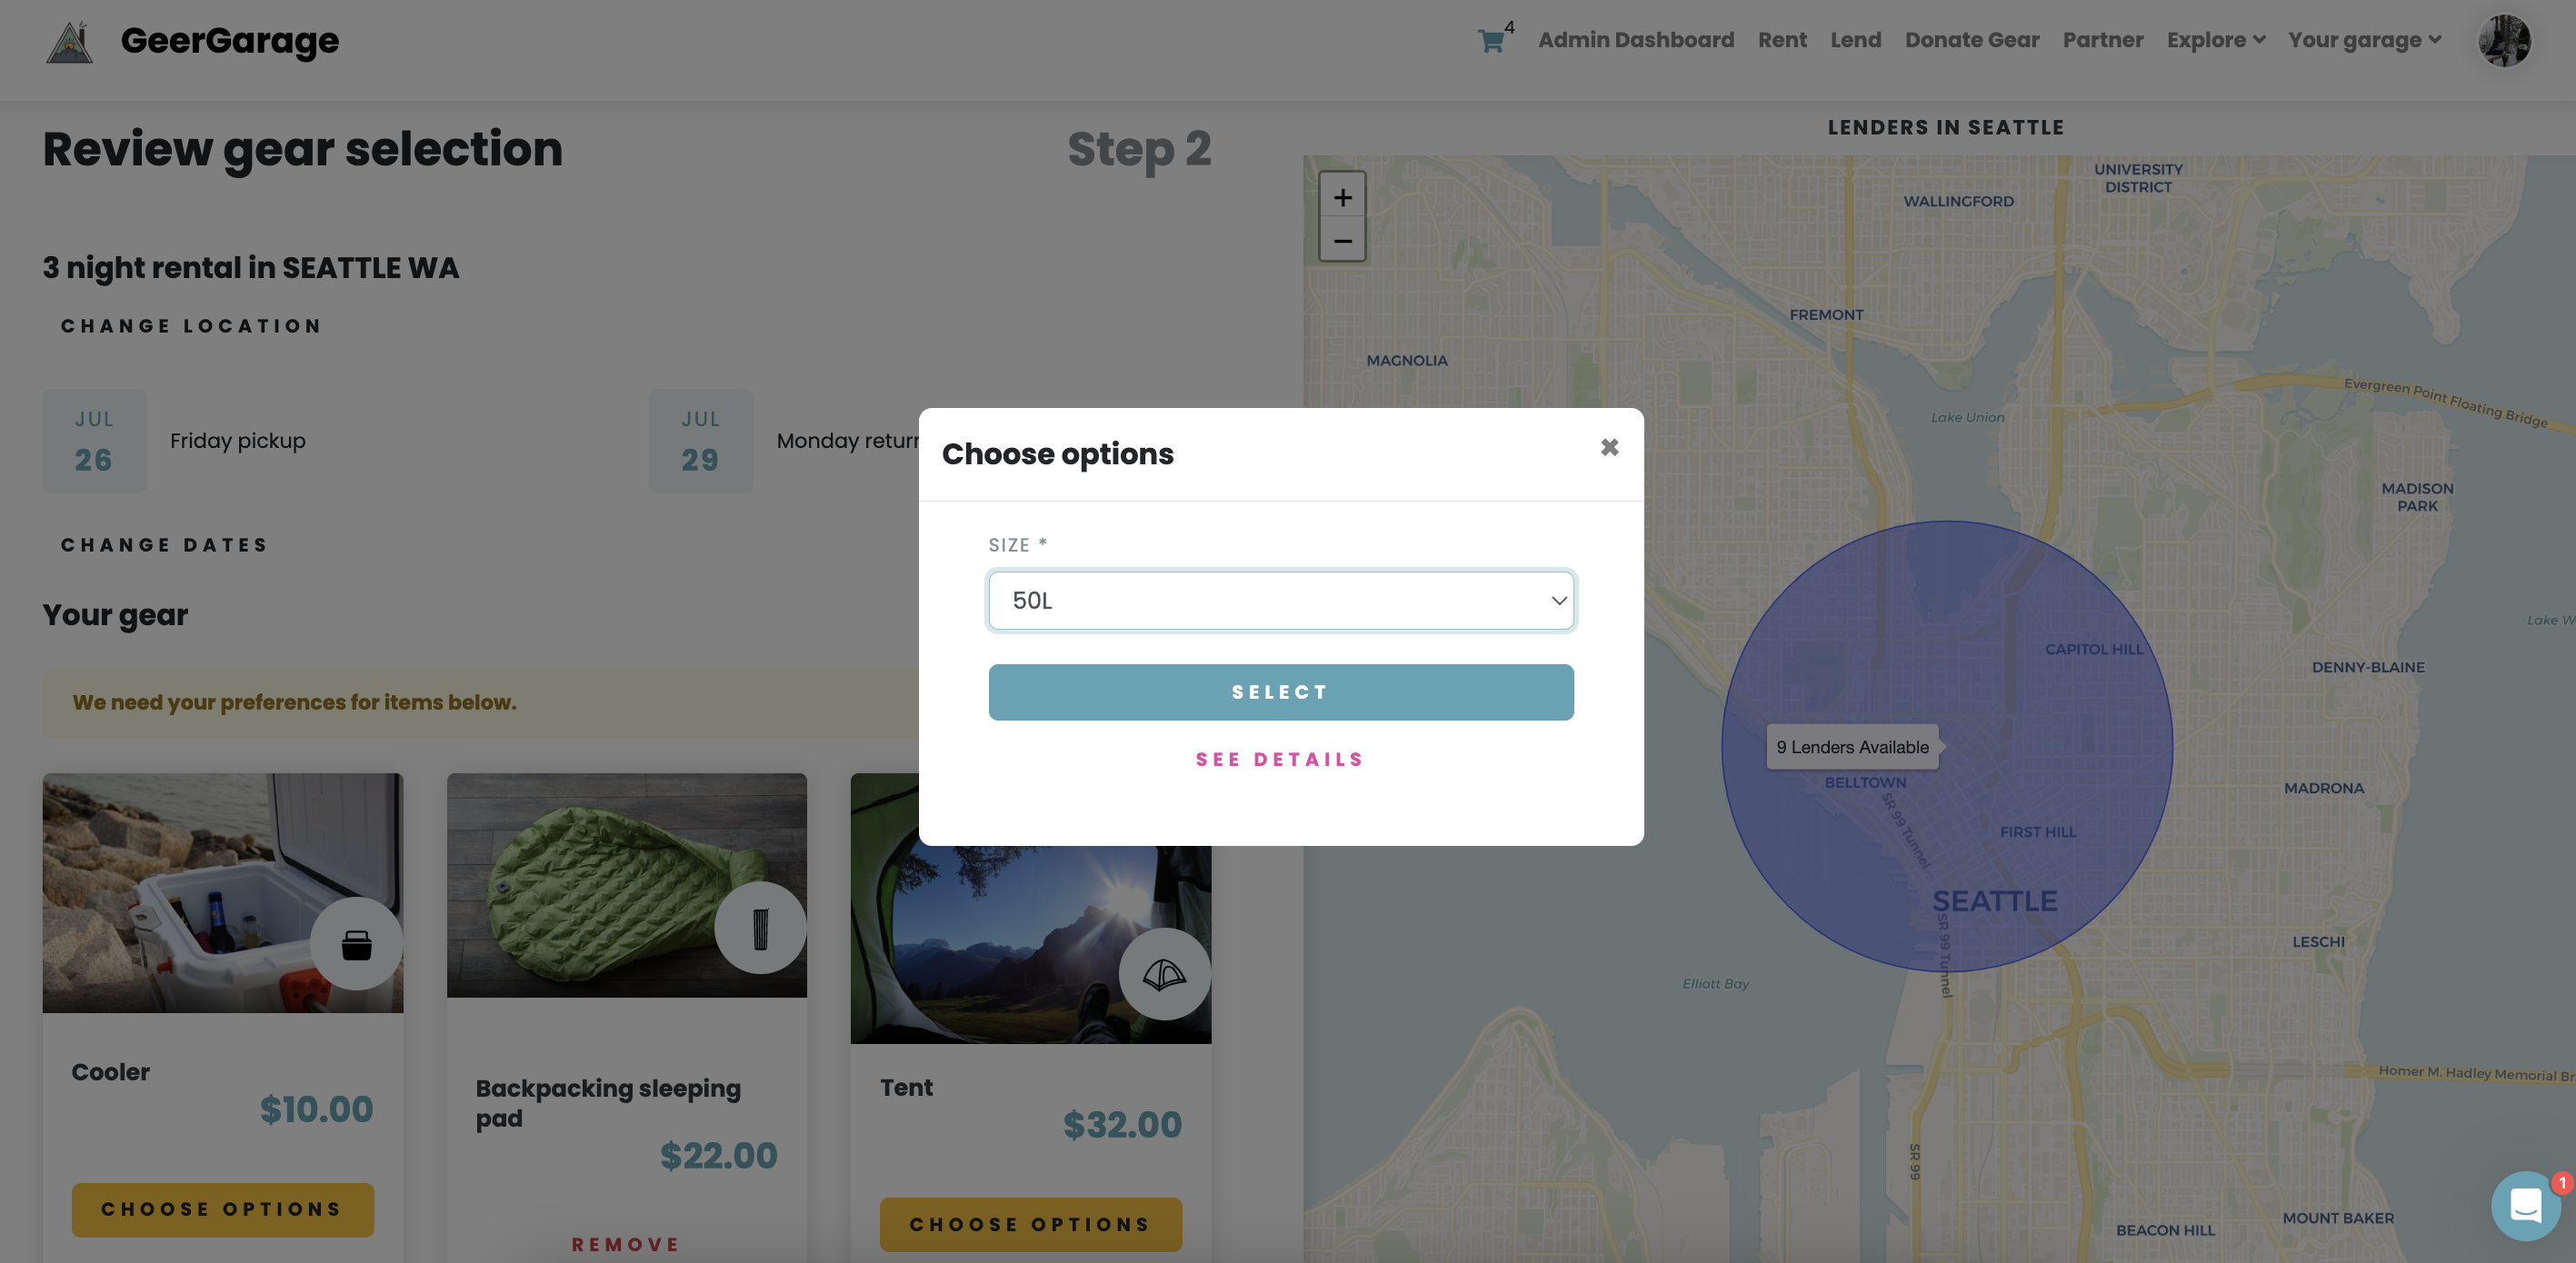
For some of the items you’ve selected, you’ll note the message that says “We need preferences for items below” and then a yellow “Choose Options” button on the card for those items. Click that button and enter in the desired information in the pop-up window that appears. Do that for all the items that are asking you to “Choose Options”
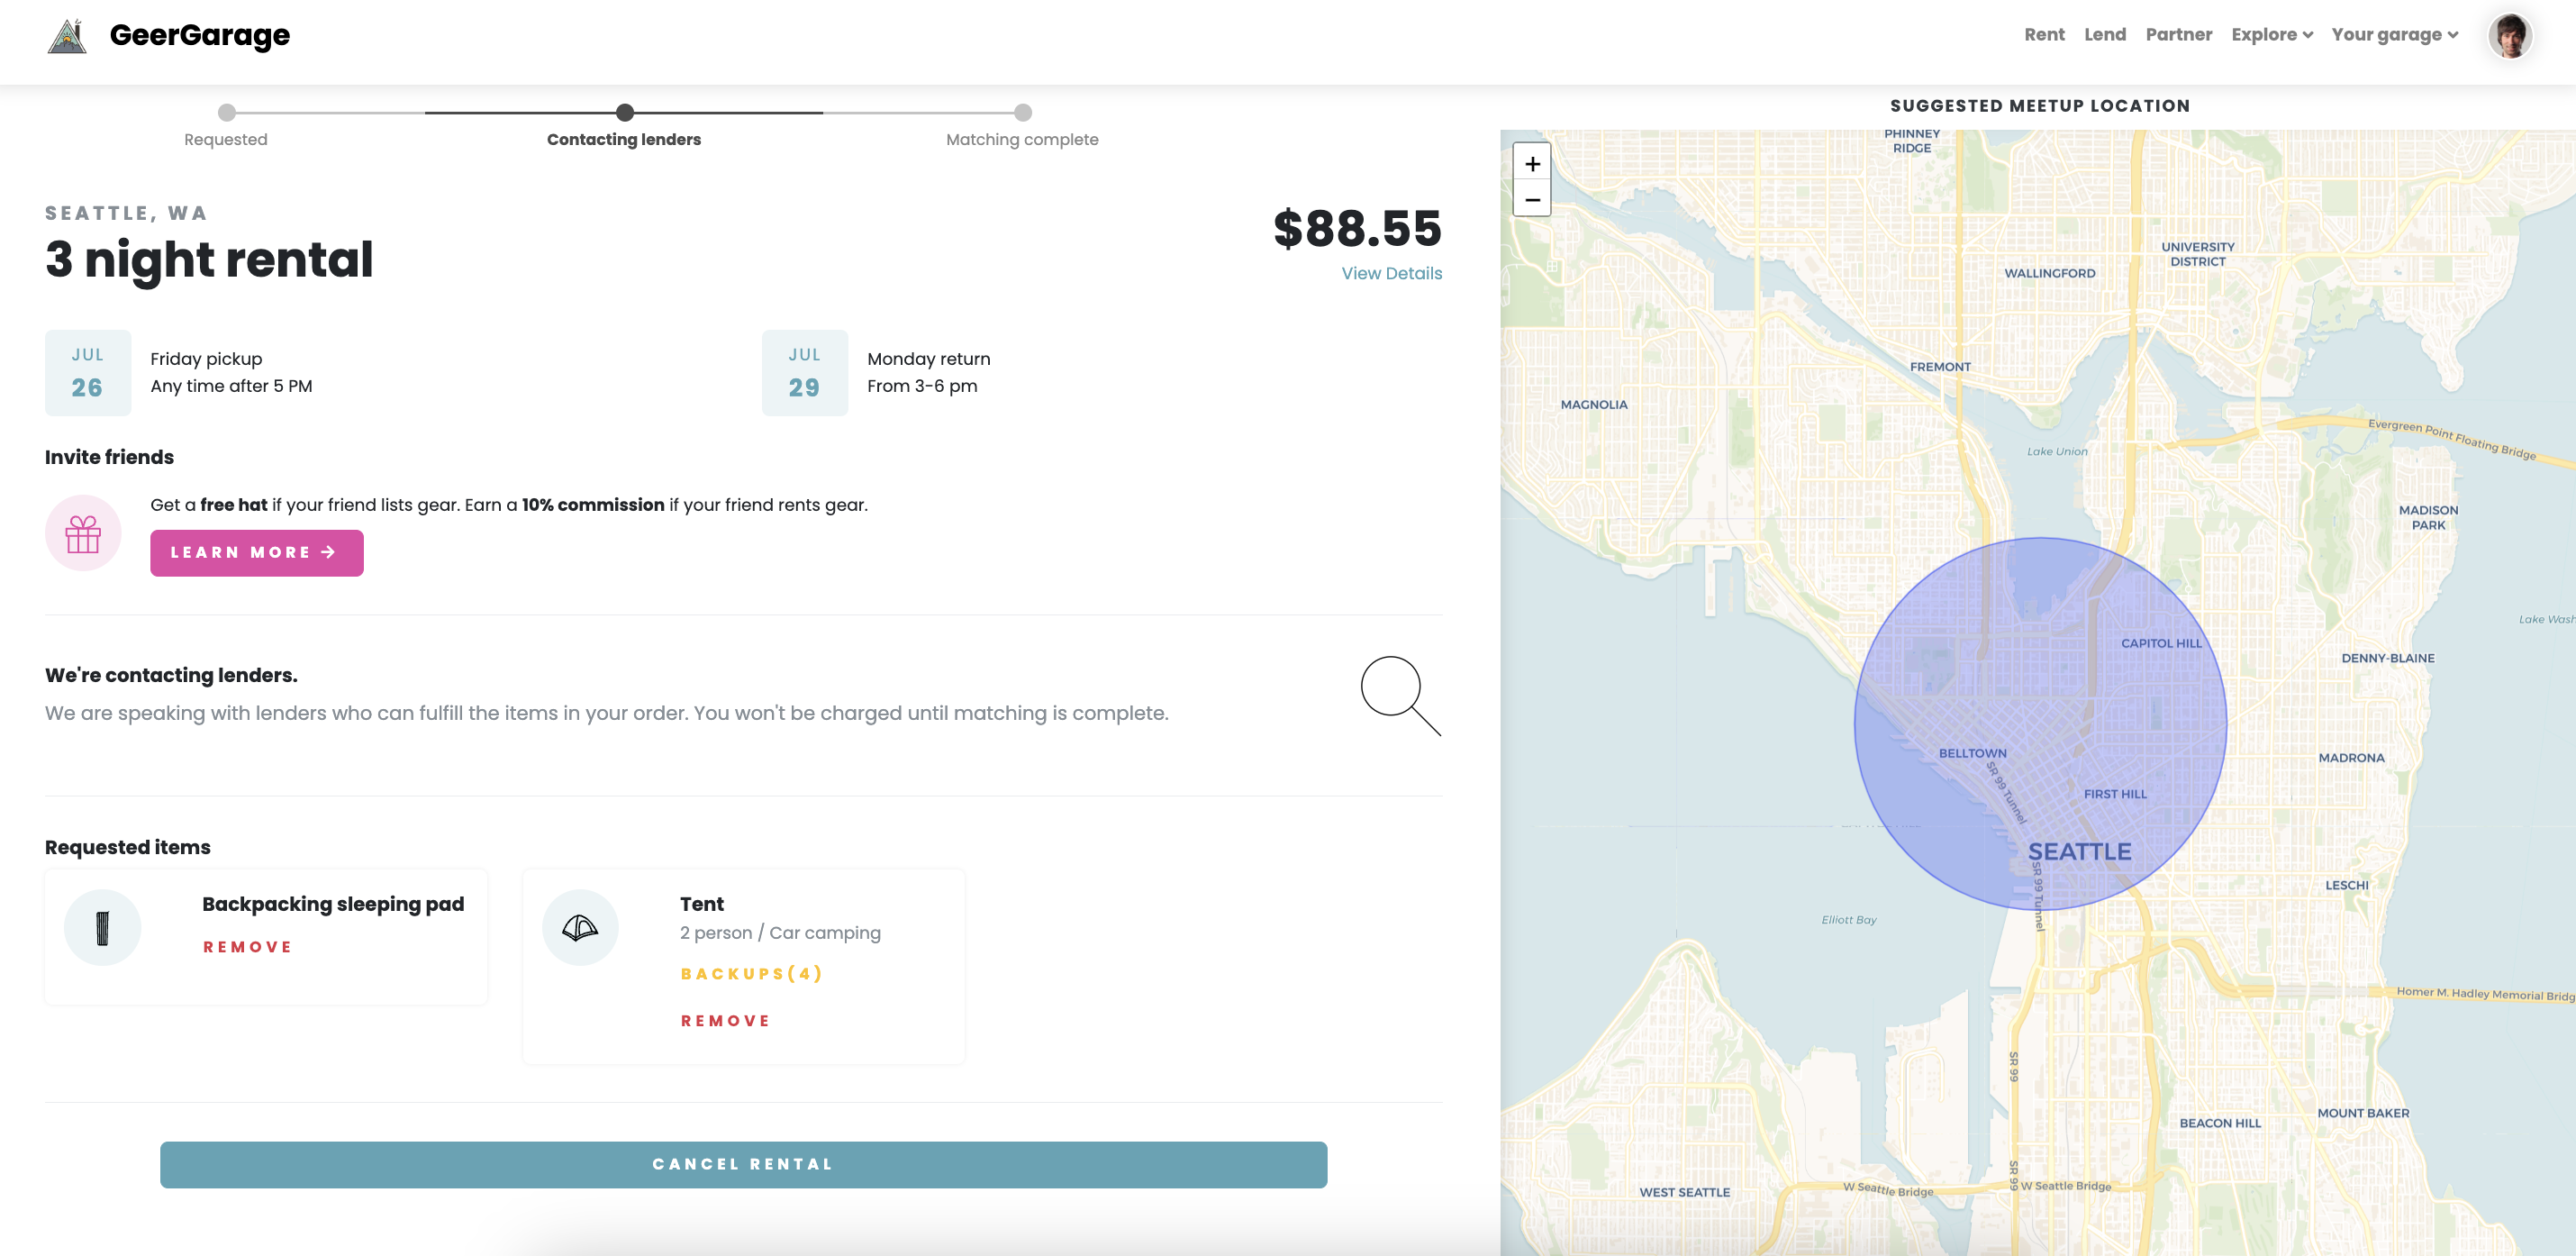
From this page, you can also see the geographic map where your items will be available, along with an indication of how many lenders are available. If you need to adjust your location, click “Change Location” at the top of the page, just under the location that is specified for the map. (I.e. Seattle, WA) If you wish to change the dates, click “Change Dates” under the specific dates.
Once you have all the information entered in accurately, click “Schedule” and our system will automatically locate lenders in your area who have that gear for the dates you are looking for!
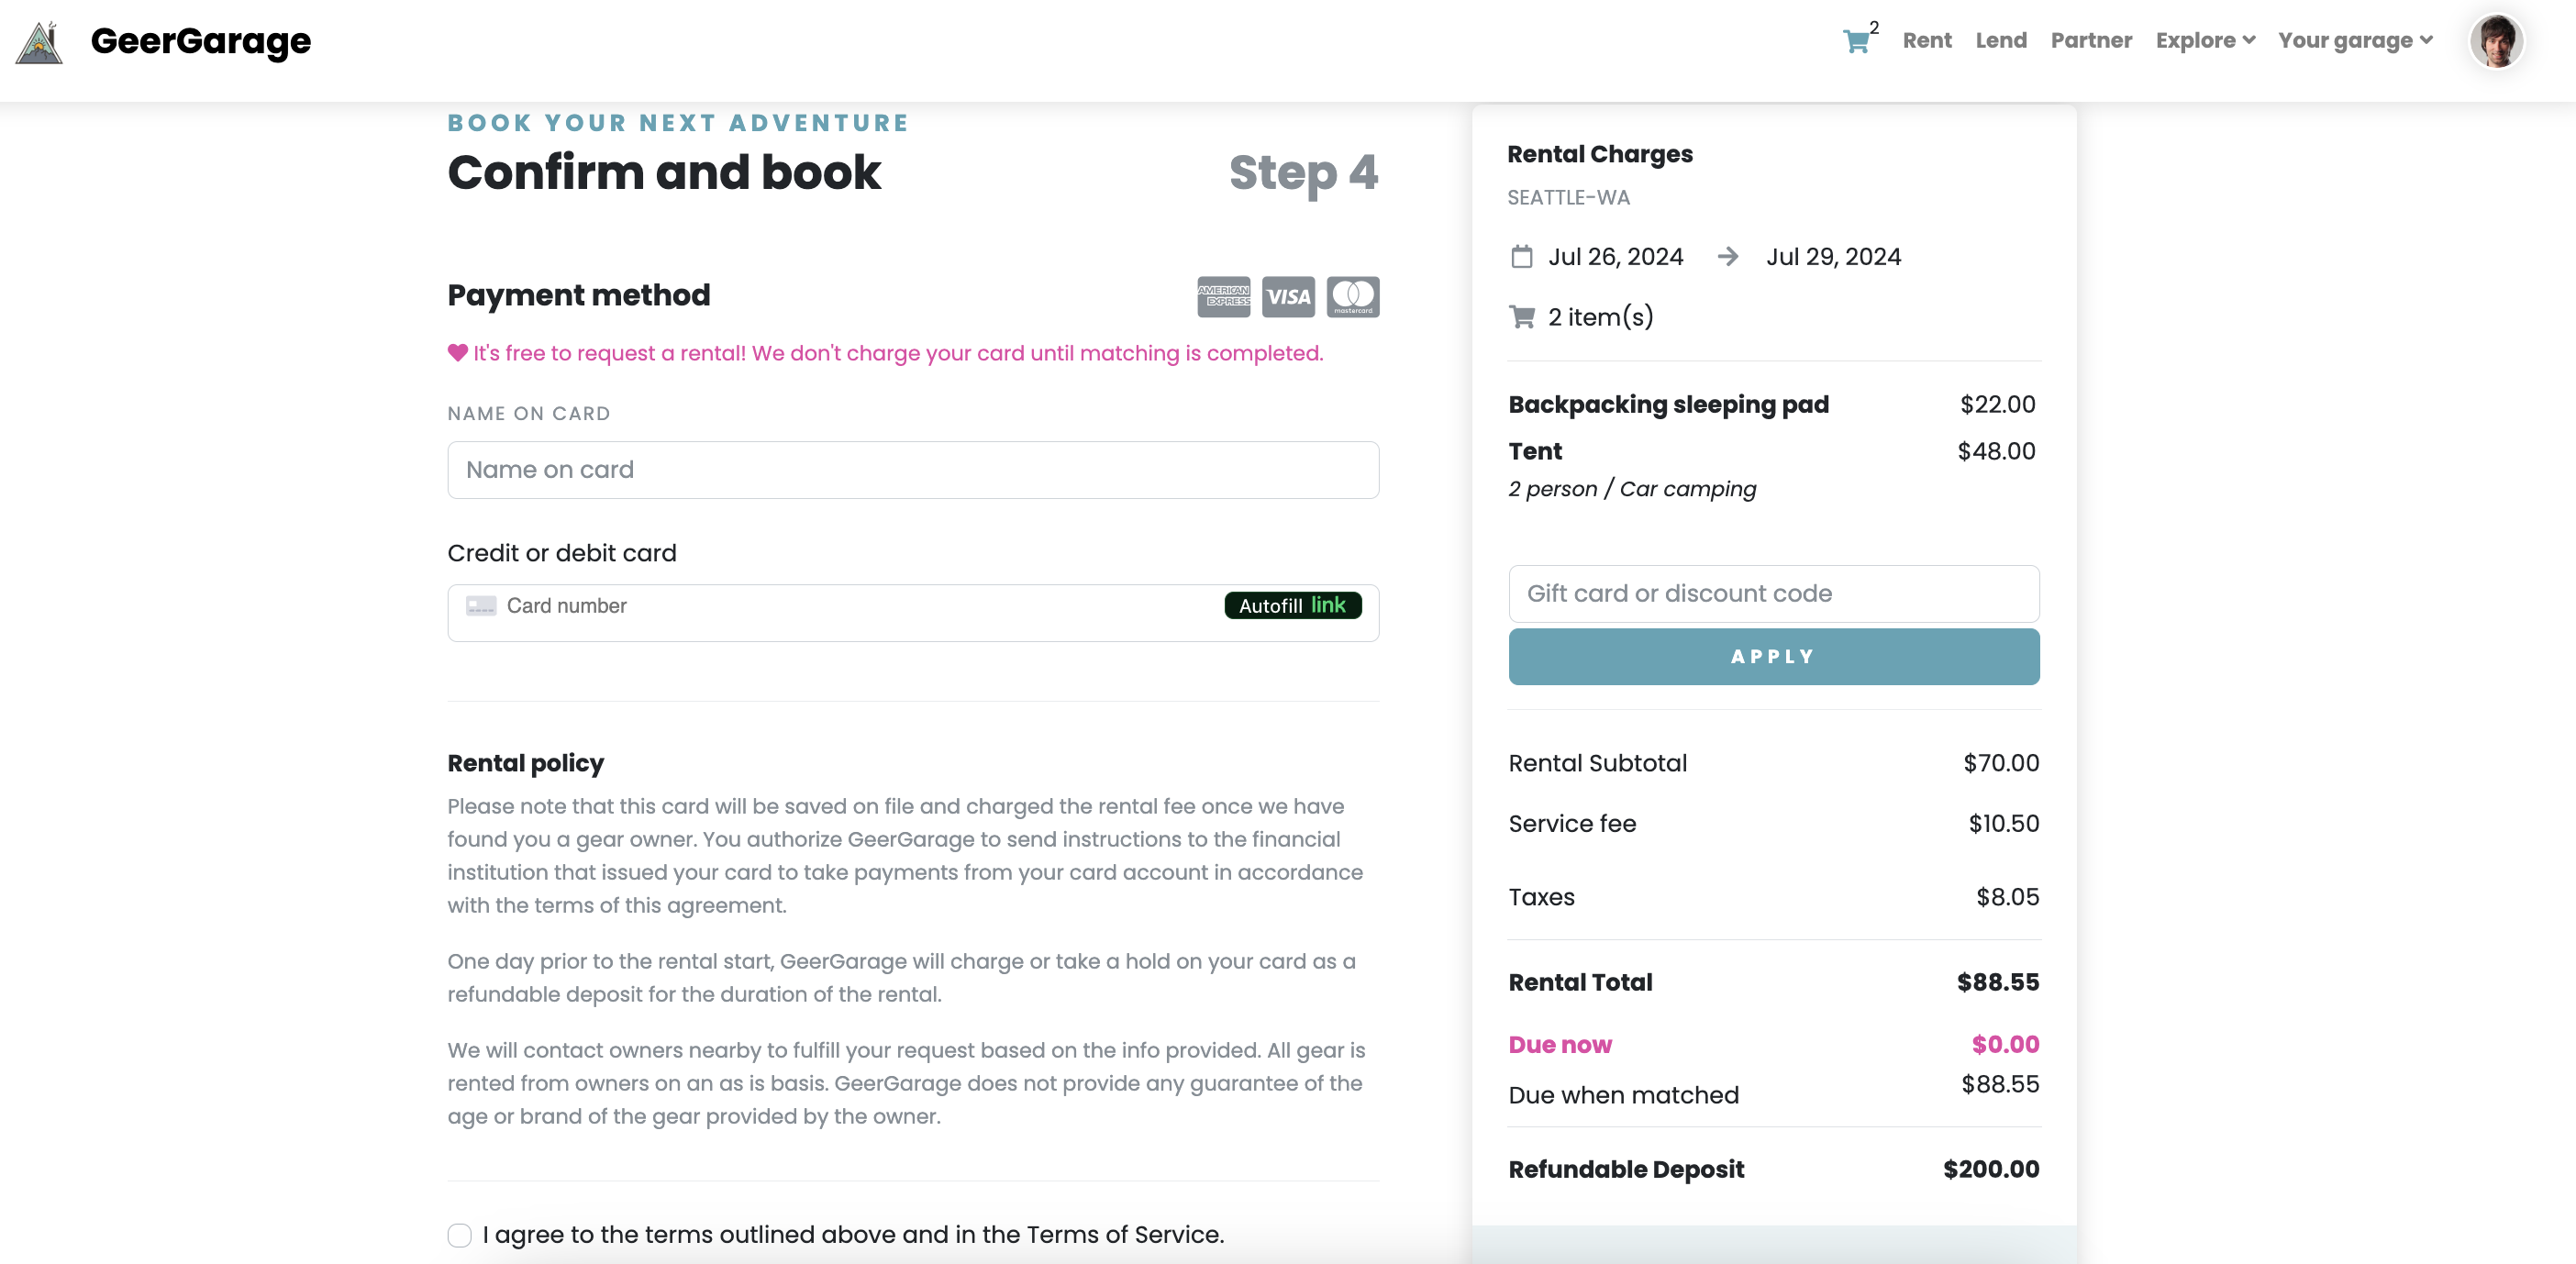
From this next page, provide some more information on when you’d like to pickup and drop off the gear. You can also include a message to lenders, which we’ll relay to these folks as our system is contacting them.
You will also see a breakdown of the costs for this order, as well as the deposit amount. We will hold this on your card for the duration of the rental to ensure that the lender is covered should you incur any damages.
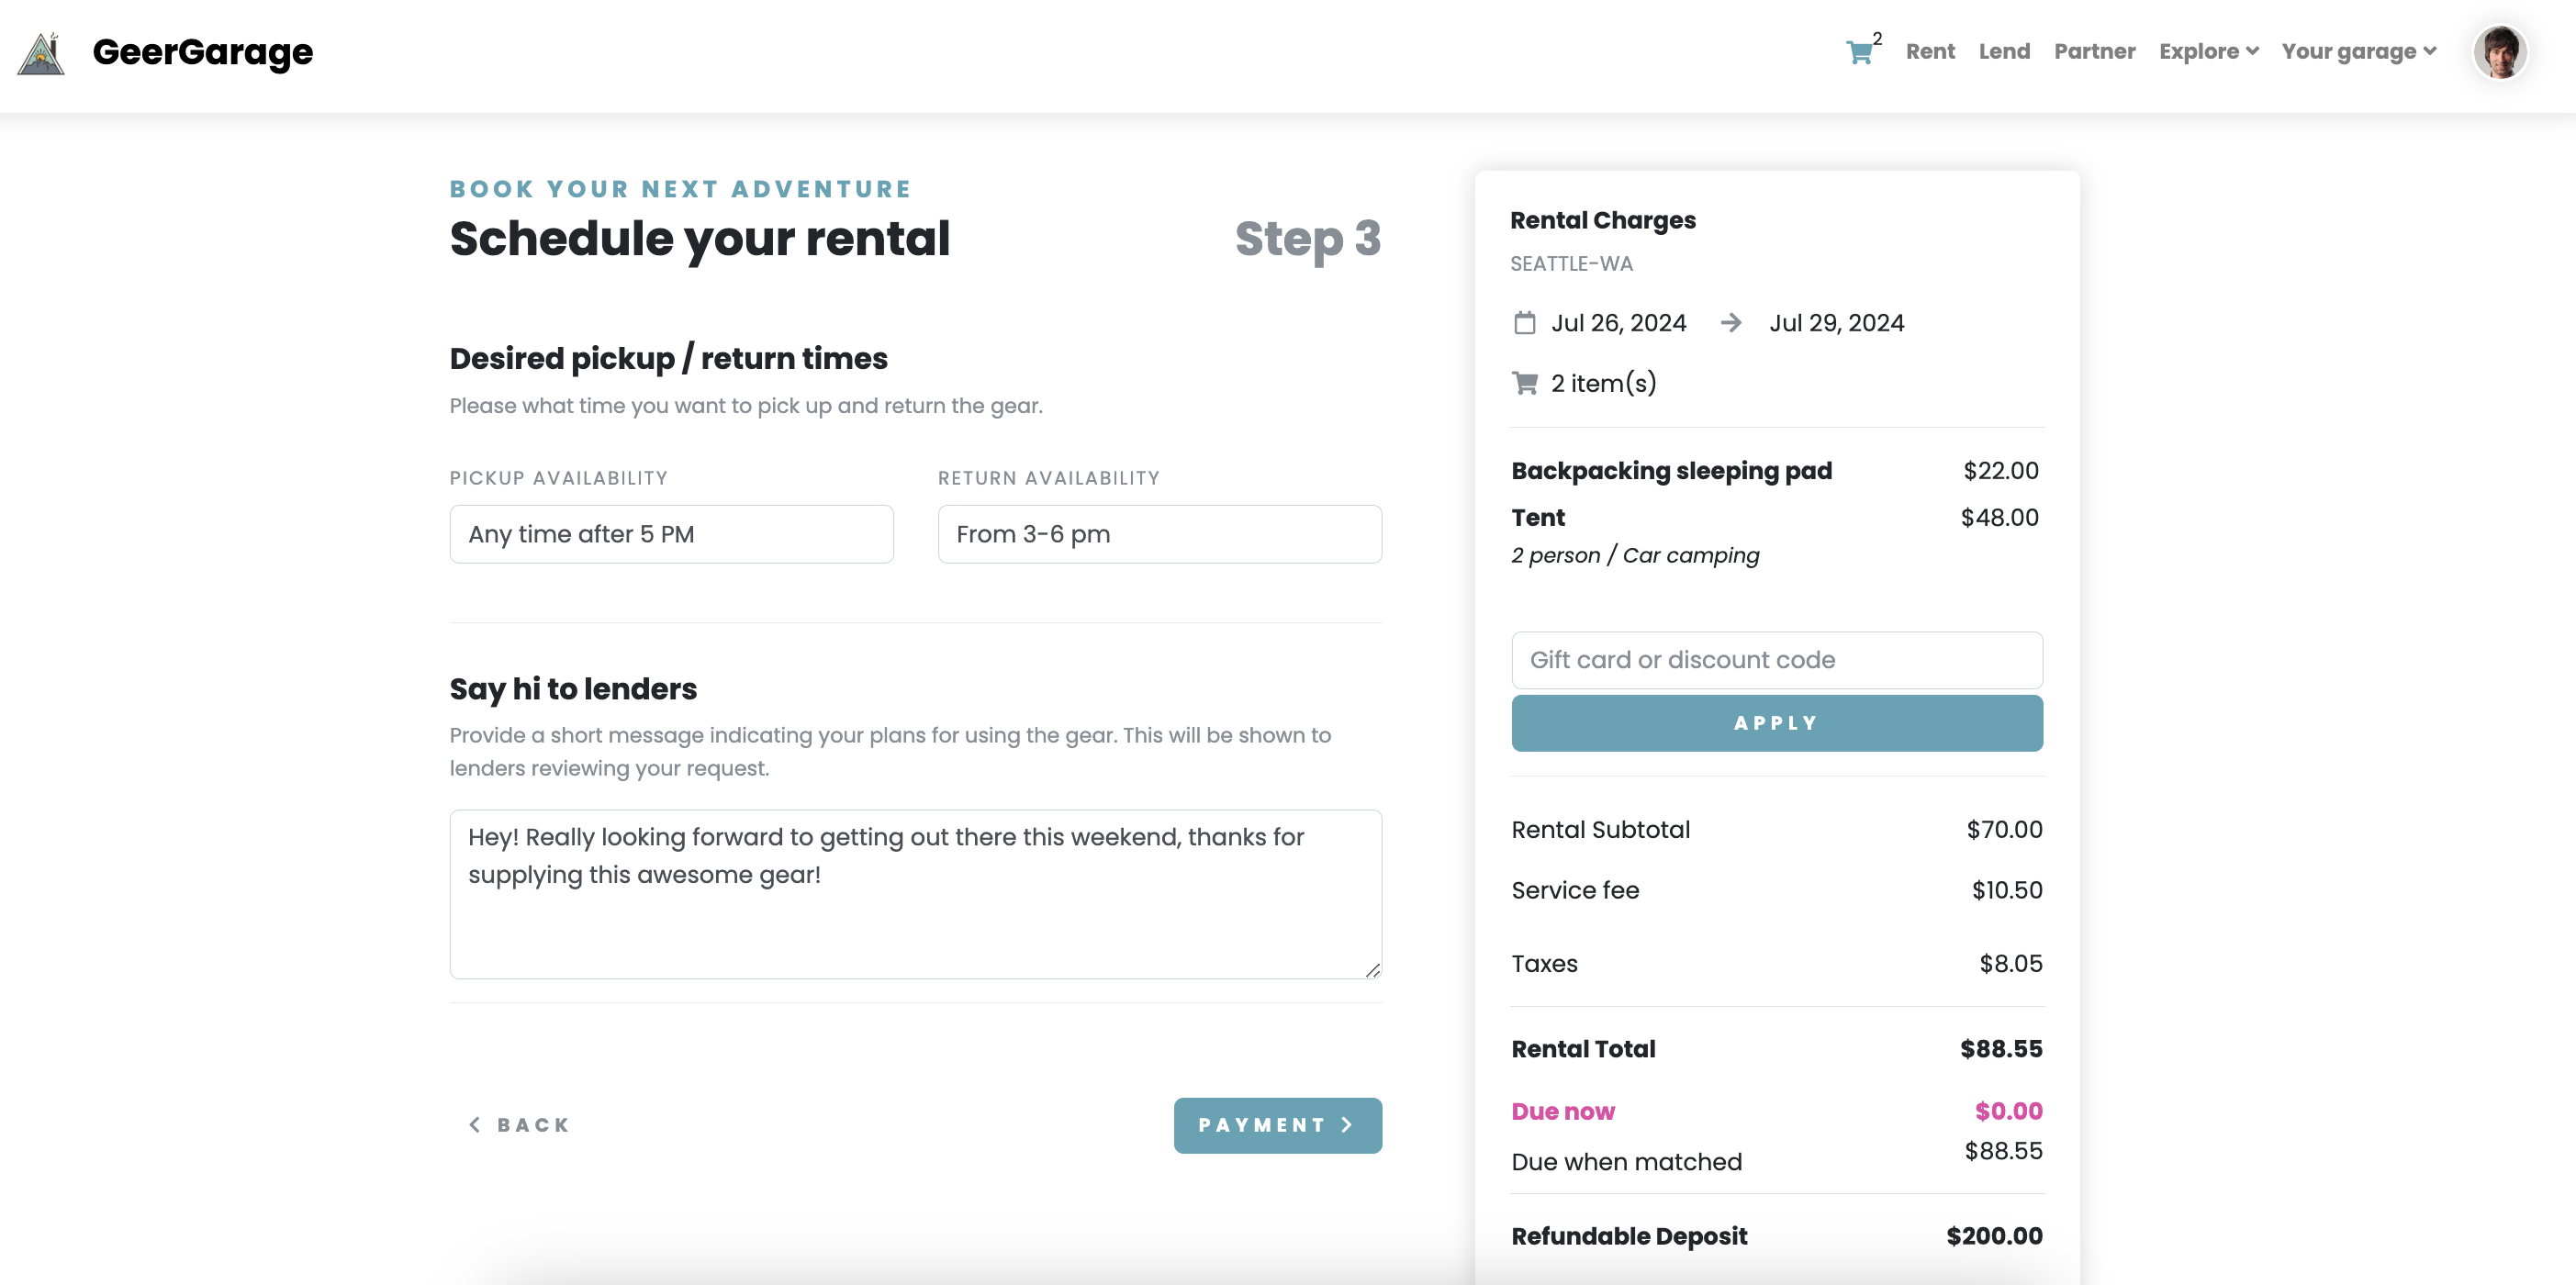
Click “Payment” to enter in your card details and finalize the order. Requesting a rental is free, you won’t be charged for the order until you are successfully matched with a lender!
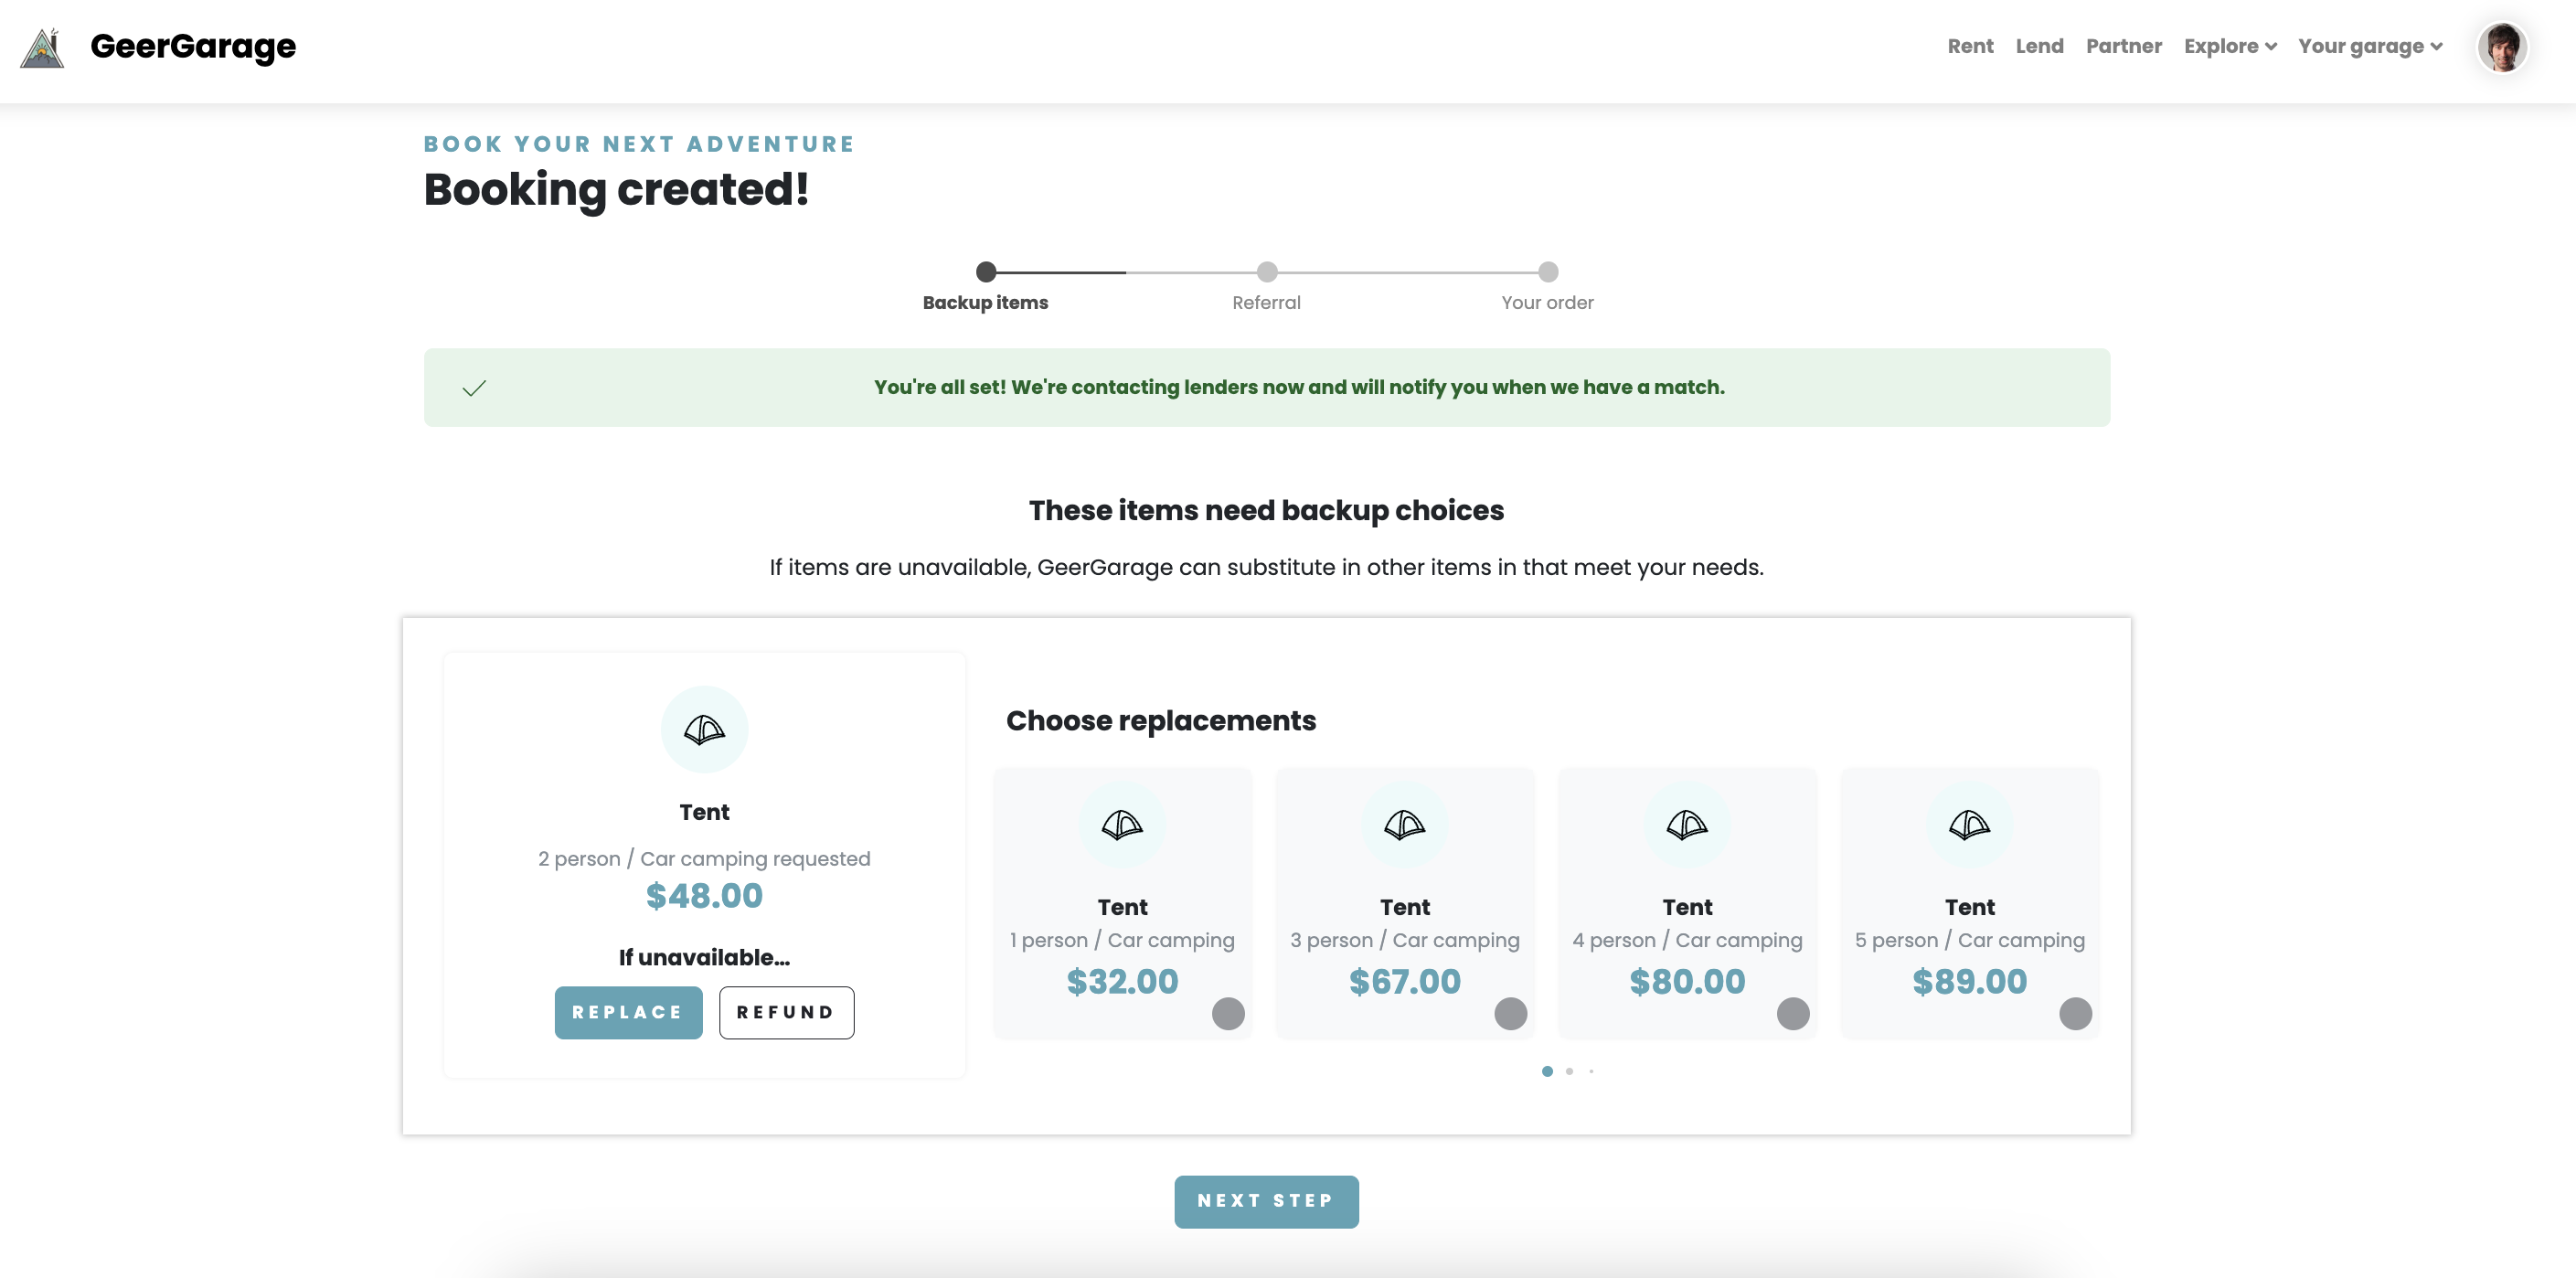
After booking your order, you can also choose a backup item, which we will use to locate additional lenders if we can’t find someone with the item you are looking for. In this case, simply select what comparable items you’d be okay with renting if we can’t find the primary item you are looking for. For example, if you are looking for a 2 person car-camping tent, but would be okay with a 2-person backpacking tent, you can specify that in this next step and that’ll increase your chances of finding an available lender.
If you are not interested in a backup item, simply select “If unavailable, refund” and you won’t get charged if we can’t find that item.
Once you’ve selected all backups, click “Next”
That’s it! You can share your referral link with friends or email them directly to sign up, but as far as your rental goes, you are all set!
Our system will contact you via email or text to let you know that we are searching for a lender. Once we’ve identified one, you will be automatically connected with the lender, where you can arrange for the pickup/drop off. Our system will handle payment, deposit and everything else!
Click “View Booking” to see the status of your rental and await our message confirming we’ve found your lender!